Year 9 Resources and links
|
Week 1
What is media?? You may have some ideas of what media is all about. Here are two short videos to help you understand the five elements of media.
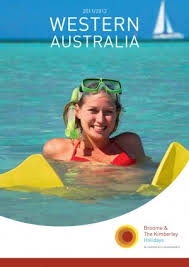
Task Today you need to create a poster of your holiday fun. Use the internet to google images that represent the things you did over the holidays. Get creative with colour and text styles Once your done you need to save your work into your newly created media folder. |
|
|
Week Two
What are SWAT Codes? These elements of media are vital to understanding how we construct meaning and create media. There are a number of different ways that media tries to get the ideas they are presenting across. There are particular ways that they do this. These particular ways are called SWAT codes. Symbolic – Objects, body Language, settings, colours/lighting Written - Headlines, captions, speech bubbles, language style, subtitles Audio – Music, sounds Technical – Camera shots, camera angles, editing and special effects |
TASK 1
Research the technical codes of camera shots and angles. Then create a powerpoint or word doc of your findings. TASK 2 Extension
If you have finished task one you can move on to task two. Research the symbolic codes of setting, colour and lighting. Find examples of films that show how these symbolic codes assist in the construction of meaning. Ad your findings to your Camera shots and angles document. The video opposite will help you understand symbols further. |
| ||
Week 3
Photography in Advertising
Course Objectives/ Learning Intentions: Develop production skills: specifically in the use of digital cameras and photography equipment and technical skills in the use of computer programs used to create brochures. Demonstrate ability to plan and design media art works for the specific purpose of travel advertising. Demonstrate analysis of media elements and conventions used in advertising a travel destination, identifying key markets and audiences for their product and applying it to the final task/product. Demonstrate ability to reflect on the task and perform constructive peer assessment.
Program links to cross-curricular areas of Literacy, Numeracy and Geography. Students will also participate and demonstrate teamwork, collaboration and negotiation skills and be given opportunities to use higher order thinking.
Composition and Elements of Photography
The key to taking good photographs is understanding the various visual elements that influence the final product.
These elements include:
Lighting- Soft, bright, subdued, dull, spotlight and directional
Colour- Placement, saturation, tone, media, opacity and angles
Texture- Tactile memory
Line- quality, type, actual or implied, angles
Shape- Visual outline
Form/Juxtaposition- Boundaries and relationships
Point of View- Eyes of the artist or the viewer
Framing- Cropping, close-up, medium or long shot, of centre or symmetrical
Editing- correction of light, colour and space
The way you CHOOSE to put these elements together will determine how the the media is represented.
Photographs are constructed from Characters, Place, Idea or Image and are based on shared social values and beliefs.
Take a look at the elements of Photography page on this website for examples of composition.
week 4
Learning Intentions
- Understand the requirements of the Assessment Task - Production
- Identify the codes and conventions used to create a travel brochure
- Demonstrate collaboration and team work
- Begin to plan and design media art work for the purpose of advertising
Assessment
Assessment Type: Production
Due Date: Term 3 Week 9
Task Weighting: 40% of semester marks
Practical Task: Production of a Travel Brochure featuring appropriate photographs taken by students.
Learning Intention: Demonstrate technical and analytical techniques in the appropriate use of images and text to construct an advertising brochure for a specified target audience.
Criteria 1. Group will discuss target audiences; Who would visits Mandurah? Why would they choose Mandurah as a holiday destination? How will we grab the attention of this audience? What attractions would they want to visit?
2. Look at sample brochures for ideas and inspiration. What do you like or dislike about them? What features attract your attention? What elements are common across different samples?
3. Group will decide on three key attractions, research them and develop a list of images you will need to photograph for the brochure
4. Create a rough template of how the brochure will look and create a shot list for the photo shoot
5. Working collaboratively as a group we will travel to the location to capture the images needed for the brochure.
6. Upload images and edit until the group is happy with the final products to add to the brochure.
7. Begin creation of the brochure; using the templates in word include text, maps, your images, and survey results
8. Have you completed editing your final product? Is it ready to be submitted?
o Check spelling, grammar, margins, colours, text size and style is consistent.
o Do you have three attractions with matching images?
o Finally think about your target audience, will they enjoy reading your brochure? Is it easy to read/ understand?
|
TASK - Planning
Now we have a understanding of the assessment task we need to begin planning and designing our product.
|
| ||
|
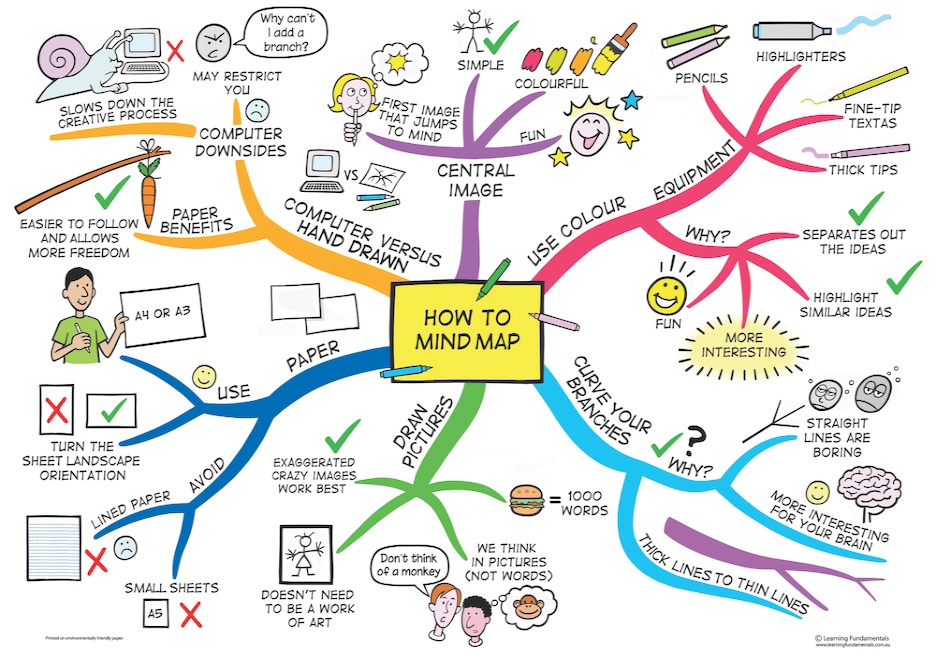
Mind Mapping
Mind Mapping is a useful technique that helps you learn more effectively, improves the way that you record information, and supports and enhances creative problem solving. By using Mind Maps, you can quickly identify and understand the structure of a subject. You can see the way that pieces of information fit together, as well as recording the raw facts contained in normal notes. More than this, Mind Maps help you remember information, as they hold it in a format that your mind finds easy to recall and quick to review. Here are some helpful ideas to draw effective Mind Maps Use Single Words or Simple Phrases – Many words in normal writing are padding, as they ensure that facts are conveyed in the correct context, and in a format that is pleasant to read. In Mind Maps, single strong words and short, meaningful phrases can convey the same meaning more potently. Excess words just clutter the Mind Map. Print Words – Joined up or indistinct writing is more difficult to read. Use Color to Separate Different Ideas – This will help you to separate ideas where necessary. It also helps you to visualize the Mind Map for recall. Color can help to show the organization of the subject. Use Symbols and Images – Pictures can help you to remember information more effectively than words, so, where a symbol or picture means something to you, use it. (You can use photo libraries like iStockPhoto to source images inexpensively.) Using Cross-Linkages – Information in one part of a Mind Map may relate to another part. Here you can draw lines to show the cross-linkages. This helps you to see how one part of the subject affects another. |
|
week 5 Practical Lesson
Learning Intentions
- Understand the requirements of the Assessment Task - Production
- Demonstrate collaboration and teamwork
- Develop the key questions for the survey
- Demonstrate technical ability to take images using composition rules
Today we will be covering the following:
- Collaborating during discussion to develop some key questions to ask the general public about their experience of Mandurah as a destination.
- Becoming familiar with the cameras and taking specific photographs for our folio
Designing a Questionnaire
When conducting a survey it is important that we obtain accurate, measurable data. The questions we choose to ask will help us determine the type of answers we will get in return. Below are some helpful videos on creating questionnaires and the PowerPoint from the lesson.
|
|
|
| survey.pptx |
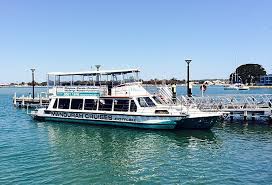
Week 6 Excursion- photo shoot
This week we will be heading out to the Mandurah Foreshore to capture the images we need for our brochure. During the shoot you need to make sure you consider the following:
Towards the end of the excursion we will take some time to ask the public to help us with our survey. Ensure you ask permission and explain what we are doing before asking your questions.
Download Images
On return to school you need to download your images into a new folder in your file.
You will then have time to look through your images and select the ones you would like to feature in your brochure.
These can be edited in Photoshop or iPhoto and saved into another folder
- Composition Rules
- Layout of your brochure will determine the composition of some of your shots
- Refer to your list of locations and shots to make sure you don't miss any shots you need
- Get down on different levels, include close ups and experiment with lighting
- Make sure you ask to take someones photo, don't assume they will be ok with it.
Towards the end of the excursion we will take some time to ask the public to help us with our survey. Ensure you ask permission and explain what we are doing before asking your questions.
Download Images
On return to school you need to download your images into a new folder in your file.
You will then have time to look through your images and select the ones you would like to feature in your brochure.
These can be edited in Photoshop or iPhoto and saved into another folder
WEEK 7 Post Production of Images
Learning Intentions
Steps to complete this week.
- Demonstrate editing techniques - Complete editing images for the brochure
- Research and writing skills - Develop the text you need for each attraction
- Numeracy skills- Create graphs from the complied survey results
Steps to complete this week.
- Create graphs for each of the question results from the survey on a Word Document
- Finish editing the images for the brochure and save them into the edited file
- Research the three attractions for relevant information to include in the brochure. Use the internet and the example brochures to help you find relevant information
Week 8 & 9 Production of the Brochure
Learning Intentions
- Research and writing skills - Develop the text you need for each attraction
- Technical skills- creating the brochure using a word template; adding text and photos to promote your three attractions to your chosen demographic
|
Steps to follow this week

9.1 Folder

9.2 Folder
|

|
week 10 reflection
This is the final lesson in Photography in Advertising. During the lesson you will need to complete the personal reflection questions. This is your opportunity to consider your challenges and successes. This is a personal reflection which means there is no right or wrong answer it is simply your opinion on your performance during the term. Reflection helps us to improve by making us aware of how we learn, what our strengths and weaknesses are and to learn from our mistakes.
